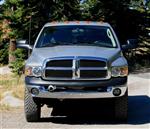
It's been a couple months since my check engine light first came on because of this code. When I read what it was on my scanner, I cleared the code and checked my gas cap for tightness and forgot about it since it was nothing serious. But then it started repeating the same code every week or two, so I figured I better get to the bottom of it.
The most common failure is a bad rubber seal on the gas cap, even though I couldn't see any cracks or deformities, I decided to replace it since it was the original eight year old cap. I got an O.E. Mopar replacement, cleared the code again and waited to see if it would come back on. Sure enough, after a few more trips to work, the CEL popped back on with the same code.
Next on my diagnostic list was to carefully check all of the rubber and plastic lines in the evaporative system for cracks, splits or loose connections. I started at the evap/charcoal canisters mounted just in front of my fuel tank and followed each line to and from the canisters throughout the entire system. The hardest ones to check are on top of the fuel tank, but a good flashlight and mirror can help with those. I didn't find any problems with the lines, so now it was time to focus on components.
The first and most obvious component is the canister. It's pretty well protected between the frame rails, but you never know when a stray stone or piece of road debris may get kicked up there and damage something. Mine looked good with no signs of splits or cracks.
Every evap system has a vent/inlet somewhere, mine is above the transmission bell housing.
- If pressure needs to be vented or air needs to be drawn in, this is where it happens.
The next component inline is the filter, this is to stop any dust from entering the evaporative system. It's a mini air filter inside a plastic housing.
- My filter sits on top of the evap/charcoal canister assembly.
- The ESIM is the bad boy that will turn on your check engine light if it sees that pressure/vacuum isn't being maintained in the system. It's a leak detector, that's what the two wires are for.
The next thing I did was blow out the vent filter and lines (a rather impressive cloud of dust). In fact it wouldn't be a bad idea to make this an annual maintenance item if your truck spends a lot of time off road or in dusty conditions.
- Blowing out the vent line.
After seven years of government work in the desert, the dust finally took its toll. Luckily I was able to find it and fix it with the investment of a little time and effort. I hope this will help someone else that may be experiencing the same problem and help save some money and a trip to the dealer/shop.
Happy New Year!!!