SimonandSimonBeast Build
-
Bill2014

- 1000_Posts

- Posts: 1549
- Joined: Fri May 09, 2014 9:03 pm
- Model Year: 2014
- Location: Northern NY
Re: SimonandSimonBeast Build
Looks like a nice clean job! 
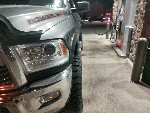
2014 Power Wagon Laramie
Titan V5 2.5" Receiver Pintle Hook
Warn wireless winch controller
.188" DOM White Knuckle Rock Sliders
Locker Bypass & Nanny Kill Switch
Moab 2006
Titan V5 2.5" Receiver Pintle Hook
Warn wireless winch controller
.188" DOM White Knuckle Rock Sliders
Locker Bypass & Nanny Kill Switch
Moab 2006
-
SimonandSimonBeast
- 250_Posts

- Posts: 416
- Joined: Wed Nov 20, 2019 10:53 pm
- Model Year: 2013
- Location: Upper Salford, PA
Re: SimonandSimonBeast Build
Thanks. Definitely one of the more tedious jobs I've done. Need more elbows and smaller hands to do this job.
Sent from my Moto Z (2) using Tapatalk
Sent from my Moto Z (2) using Tapatalk
-
SimonandSimonBeast
- 250_Posts
- Posts: 416
- Joined: Wed Nov 20, 2019 10:53 pm
- Model Year: 2013
- Location: Upper Salford, PA
Re: SimonandSimonBeast Build
Just added a couple of 4" pipe couplers to add strength and help leak proof the 2 intake tube joints. I credit this idea to Justin. I highly recommend doing this as part of the install, not afterwards. I had to undo a bit of my work to sneak these couplers in.
Sent from my Moto Z (2) using Tapatalk
Sent from my Moto Z (2) using Tapatalk
-
SimonandSimonBeast
- 250_Posts
- Posts: 416
- Joined: Wed Nov 20, 2019 10:53 pm
- Model Year: 2013
- Location: Upper Salford, PA


-
SimonandSimonBeast
- 250_Posts
- Posts: 416
- Joined: Wed Nov 20, 2019 10:53 pm
- Model Year: 2013
- Location: Upper Salford, PA
Re: SimonandSimonBeast Build
Looky what ol' St. Nick brought for me...
Sent from my Moto Z (2) using Tapatalk

Sent from my Moto Z (2) using Tapatalk
-
SimonandSimonBeast
- 250_Posts
- Posts: 416
- Joined: Wed Nov 20, 2019 10:53 pm
- Model Year: 2013
- Location: Upper Salford, PA
Re: SimonandSimonBeast Build
Installed the Abel Swaybar Bypass today. I have to say Dave makes job easy, and works perfectly. Here is the step-by-step. This may be redundant for some people, but might be helpful to others.
First step, disconnect wire harness from smart bar.

Sent from my Moto Z (2) using Tapatalk
First step, disconnect wire harness from smart bar.


Sent from my Moto Z (2) using Tapatalk
-
SimonandSimonBeast
- 250_Posts
- Posts: 416
- Joined: Wed Nov 20, 2019 10:53 pm
- Model Year: 2013
- Location: Upper Salford, PA
Re: SimonandSimonBeast Build
Next remove 3 bolts attaching smart bar housing and detach.

Sent from my Moto Z (2) using Tapatalk


Sent from my Moto Z (2) using Tapatalk
-
SimonandSimonBeast
- 250_Posts
- Posts: 416
- Joined: Wed Nov 20, 2019 10:53 pm
- Model Year: 2013
- Location: Upper Salford, PA
Re: SimonandSimonBeast Build
Next insert PVC spacer into housing still attached to the truck.

Sent from my Moto Z (2) using Tapatalk


Sent from my Moto Z (2) using Tapatalk
-
SimonandSimonBeast
- 250_Posts
- Posts: 416
- Joined: Wed Nov 20, 2019 10:53 pm
- Model Year: 2013
- Location: Upper Salford, PA
Re: SimonandSimonBeast Build
Drill small hole in smart bar module plastic webbing, insert E clip to groove in shaft, attach zip tie through hole and above E clip on shaft, retract shaft and tighten zip tie and affix rubber tip on shaft.


Sent from my Moto Z (2) using Tapatalk


Sent from my Moto Z (2) using Tapatalk
-
SimonandSimonBeast
- 250_Posts
- Posts: 416
- Joined: Wed Nov 20, 2019 10:53 pm
- Model Year: 2013
- Location: Upper Salford, PA
Re: SimonandSimonBeast Build
Affix dielectric grease on module gasket, affix clear plastic cover over module and press against grease.

Sent from my Moto Z (2) using Tapatalk


Sent from my Moto Z (2) using Tapatalk
-
SimonandSimonBeast
- 250_Posts
- Posts: 416
- Joined: Wed Nov 20, 2019 10:53 pm
- Model Year: 2013
- Location: Upper Salford, PA
Re: SimonandSimonBeast Build
Apply provided silicone sealant to new actuator motor and screw it to the aluminum adapter plate. I used slide channel pliers to snug it up carefully. Attach adapter plate to smart bar housing using provided bolts. I used a little blue locktite. Torque to 37 lbs once on truck.

Sent from my Moto Z (2) using Tapatalk


Sent from my Moto Z (2) using Tapatalk
-
SimonandSimonBeast
- 250_Posts
- Posts: 416
- Joined: Wed Nov 20, 2019 10:53 pm
- Model Year: 2013
- Location: Upper Salford, PA
Re: SimonandSimonBeast Build
Apply sealant to housing still attached to the truck. Press on smart bar module, affix OE bolts and torque all bolts to 37 lbs. Reattach factory harness and new override harness. Use dielectric grease on both harness clips.


Sent from my Moto Z (2) using Tapatalk


Sent from my Moto Z (2) using Tapatalk
-
SimonandSimonBeast
- 250_Posts
- Posts: 416
- Joined: Wed Nov 20, 2019 10:53 pm
- Model Year: 2013
- Location: Upper Salford, PA
Re: SimonandSimonBeast Build
Run override harness up toward fuse block (I ran mine down before attaching to the module...gravity helps). Drill hole in fuse block housing to run red wire into fuse block. Attach add-a-fuse wire provided. Remove proper fuse from block and insert it into empty slot on add-a-fuse connector. Seal spot where wire enters housing. Insert add-a-fuse in proper slot (#77 on my '13). Close housing. Run black ground wire to body ground bolt. Secure wire harness in engine bay with zip ties as needed.
Sent from my Moto Z (2) using Tapatalk

Sent from my Moto Z (2) using Tapatalk
-
SimonandSimonBeast
- 250_Posts
- Posts: 416
- Joined: Wed Nov 20, 2019 10:53 pm
- Model Year: 2013
- Location: Upper Salford, PA
Re: SimonandSimonBeast Build
Drill hole in clutch plate cover large enough to route remaining wire harness through hole. Apply sealant once wire is routed through hole. Use zip ties as needed.
Sent from my Moto Z (2) using Tapatalk

Sent from my Moto Z (2) using Tapatalk
-
SimonandSimonBeast
- 250_Posts
- Posts: 416
- Joined: Wed Nov 20, 2019 10:53 pm
- Model Year: 2013
- Location: Upper Salford, PA
Re: SimonandSimonBeast Build
I drilled and inserted the control button in the same small dash panel that I installed my KC aux light switches in. I connected the ground wire to the same bolt I attached my aux light switch ground wires under the dash. Secure extra wires with zip ties as needed. Done. 

Sent from my Moto Z (2) using Tapatalk


Sent from my Moto Z (2) using Tapatalk
-
Retired BLM Rig

- 1000_Posts
- Posts: 1157
- Joined: Sun Jan 31, 2016 6:51 pm
- Model Year: 2008
- Location: State of Jefferson
Re: SimonandSimonBeast Build
Nicely done!
I should just have you write my next set of instructions.
I should just have you write my next set of instructions.
2008 Quad Cab - Stock RTI = 655, curb weight = 6081 lbs. Abel Components Plug & Play Locker Bypass®, Abel Components Full SmartBar Bypass®, Abel Components Nanny Kill Switch®, 2000 Watt ProMariner TruePower Plus Pure Sine Wave Inverter, Trailer Hitch Storage, MOLLE Door Panels, Wilton Hitch Vice, Locking Under Seat Storage Drawer, Smittybilt 2781 Air Compressor, 14K PullPal, Hi-Lift First Responder Jack, 25' Jumper Cable System, Slip Yoke Eliminator in a Can, Evolution vs. God, Share the Umbrella, Make sure you're right with God before you meet him!
-
SimonandSimonBeast
- 250_Posts
- Posts: 416
- Joined: Wed Nov 20, 2019 10:53 pm
- Model Year: 2013
- Location: Upper Salford, PA
Re: SimonandSimonBeast Build
Lol...yeah, I was kind of thinking it was redundant since your instructions are so good. It really was one of the easier mods I've done. Maybe if some people on the fence see it in my build, they will pull the trigger.
Sent from my Moto Z (2) using Tapatalk
Sent from my Moto Z (2) using Tapatalk
-
SimonandSimonBeast
- 250_Posts
- Posts: 416
- Joined: Wed Nov 20, 2019 10:53 pm
- Model Year: 2013
- Location: Upper Salford, PA
Re: SimonandSimonBeast Build
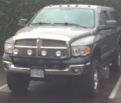
I know this isn't a Power Wagon, but now I have a build 2.0. picked up this 2005 LJ for my 18 yr old son. Now it is the father and son build. I will have to decide between this and my wagon from a budgetary standpoint.


Sent from my Moto Z (2) using Tapatalk


Sent from my Moto Z (2) using Tapatalk
Re: SimonandSimonBeast Build
Additions: Frame mounted .188 DOM 3" steel rock rails, low profile steps;1.5” Skyjacker leveling kit; Bully Dog GT Platinum A-pillar mount programmable performance chip, monitor,& tuner; Linex Platinum OTR HD bed/rock panel coating; Red Ryder cab high fiberglass canopy; 2” Linex brush guard w/4-4” Halogen off road lights; Hopkins Trailer Mate brake controller; Bearcat Pro 68XL CB; Mopar black fender flares; PW winch accessory kit/remote control.
Tools: hand tools, 60” Extreme High Lift; rigging; straps; shackles; F&R chains; (2ea) rear wheel well NATO 20 L narrow gas cans & 5# extinguishers
Updates: Jasper Remfgr’d 5.7 Hemi Engine; Open Range AT 35x12.5 x17 MP3 10 ply E tires; Moog HD U/L front axle ball joints & wheel bearings; new link, sway, y bar & bushing assemblies; fuel pump; A/C exhaust fan & compressor;1 ton HEMI transmission cooler; OEM radiator; front pinion seal & bearing; Denso 180-amp alternator; Interstate 850 CCA HD battery; water pump, serpentine belt, Bilstein 2 5100 shocks/HD steering damper; F&R locker motors,sensors/u joints; 3" Magna flow cat back rear exit dual exhausts; Performance Brake/slotted rotor/caliper/pads/brake lines
-
RustyPW
- 2000_Posts

- Posts: 5476
- Joined: Thu May 24, 2012 4:23 pm
- Model Year: 2008
- Location: Brownsville Pa.
Re: SimonandSimonBeast Build
Nice way to start your son out. My neighbor redid 3 Jeeps for his 2 kids. The one got totaled. 
PWOC #53
2008 POWER WAGON RC
My build thread. http://forum.powerwagonregistry.org/vie ... =13&t=2826
Moab '09, '10, '12, '14, '20, '22
Rausch Creek - Summer '10, Spring-Fall '11, Spring '12, Summer '13, Summer '14, Summer '15, Summer '16, Summer '17, Summer '18, Summer '20, Summer '22, Summer '23, Summer '24,
AOAA Summer '19.
Russ
NRA - Benefactor, Golden Eagle.

Re: SimonandSimonBeast Build
Great project. Enjoy the father son time!
2012 Power Wagon
White Knuckle Sliders, myoung locker bypass, Thuren Track Bar, Thuren Control Arms, Toyo Open Country RT 37x12.50, Method Race Wheels
White Knuckle Sliders, myoung locker bypass, Thuren Track Bar, Thuren Control Arms, Toyo Open Country RT 37x12.50, Method Race Wheels
-
SimonandSimonBeast
- 250_Posts
- Posts: 416
- Joined: Wed Nov 20, 2019 10:53 pm
- Model Year: 2013
- Location: Upper Salford, PA
Re: SimonandSimonBeast Build
I had a '97 TJ I bought new. Drove it for 11 years. Loved wrenching on that and wheeling it. I really liked the LJ idea when they came out. So capable when they get lifted while getting a little more usable interior space. I was lucky to find this nice specimen nearby.
Sent from my Moto Z (2) using Tapatalk
Sent from my Moto Z (2) using Tapatalk
Re: SimonandSimonBeast Build
May you & your son enjoy many good times w the rebuild & use 


Additions: Frame mounted .188 DOM 3" steel rock rails, low profile steps;1.5” Skyjacker leveling kit; Bully Dog GT Platinum A-pillar mount programmable performance chip, monitor,& tuner; Linex Platinum OTR HD bed/rock panel coating; Red Ryder cab high fiberglass canopy; 2” Linex brush guard w/4-4” Halogen off road lights; Hopkins Trailer Mate brake controller; Bearcat Pro 68XL CB; Mopar black fender flares; PW winch accessory kit/remote control.
Tools: hand tools, 60” Extreme High Lift; rigging; straps; shackles; F&R chains; (2ea) rear wheel well NATO 20 L narrow gas cans & 5# extinguishers
Updates: Jasper Remfgr’d 5.7 Hemi Engine; Open Range AT 35x12.5 x17 MP3 10 ply E tires; Moog HD U/L front axle ball joints & wheel bearings; new link, sway, y bar & bushing assemblies; fuel pump; A/C exhaust fan & compressor;1 ton HEMI transmission cooler; OEM radiator; front pinion seal & bearing; Denso 180-amp alternator; Interstate 850 CCA HD battery; water pump, serpentine belt, Bilstein 2 5100 shocks/HD steering damper; F&R locker motors,sensors/u joints; 3" Magna flow cat back rear exit dual exhausts; Performance Brake/slotted rotor/caliper/pads/brake lines
Re: SimonandSimonBeast Build
your son just chose the best possible first vehicle.
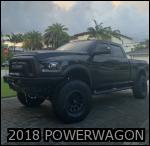
2018 Powerwagon-6.4 Hemi
Nanny kill switch and Locker Bypasses
Thuren Tuned King 3.0 & 2.5 Pintop Stage 3/2
17 Method NV-Toyo RT 37
Evo On-Demand Air Swaybar Disconnect
S&B Intake-Mufflex-Magnaflow/resonator delete
SPOD Bantam
On-Board air ARB CKMTA12
Baja design and Rigid Industries
Purple Cranium Spider dif guards
Pedal Commander
-
SimonandSimonBeast
- 250_Posts
- Posts: 416
- Joined: Wed Nov 20, 2019 10:53 pm
- Model Year: 2013
- Location: Upper Salford, PA
Re: SimonandSimonBeast Build
Thanks guys. Looking forward to wrenching and wheeling with him. Already spent a few hundred on bringing the interior, which wasn't bad, up to date. Rough Country seat covers, Weathertech mats, Grabbars, bluetooth JVC marine spec stereo and Infinity speakers all around. Next mods will probably be sliders and diff guards, before we tackle lift, tires and driveline. Got to eliminate that slip yoke for sure. Any suggestions based on experience are welcome.
Sent from my Moto Z (2) using Tapatalk
Sent from my Moto Z (2) using Tapatalk